- Stock: 2
- Model: AC974-013-01
- Weight: 0.11kg
- Dimensions: 80.00mm x 80.00mm x 30.00mm
- SKU: AC974-013-01
- UPC: 6009515893798
- MPN: 1
SERIES 974
A universal welding gauge is used to measure various parameters related to welding, such as bead width, depth, and undercut. By using a universal welding gauge, you can ensure that your welds meet the required standards and are of high quality.
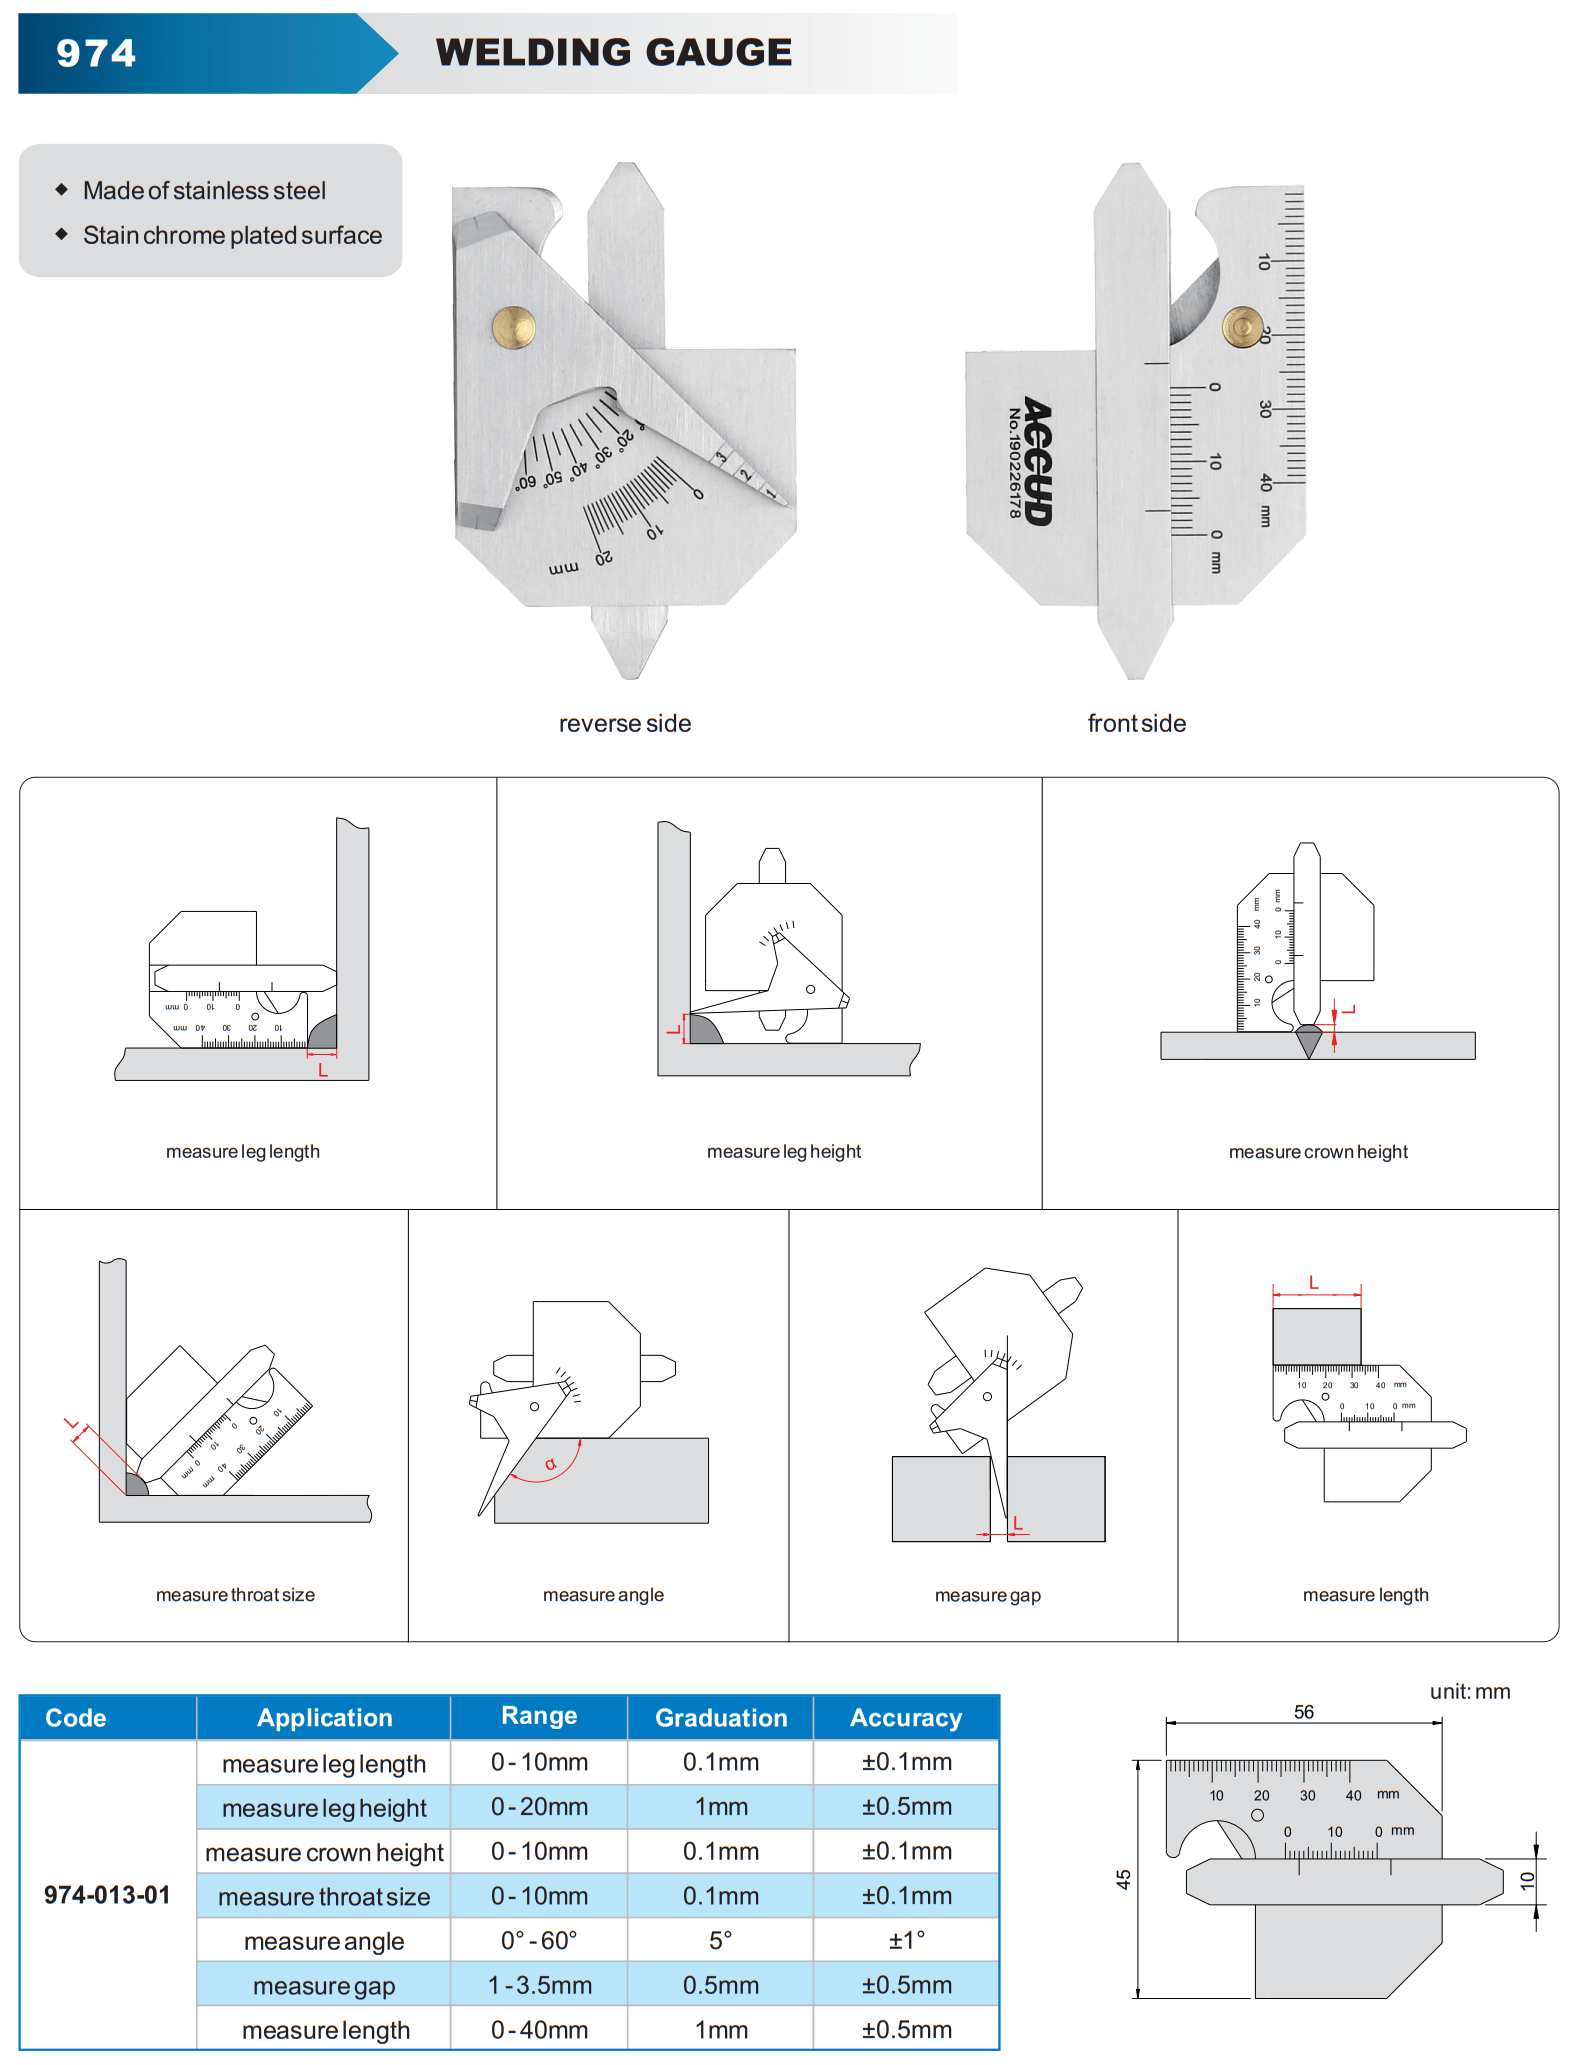
- Measure leg length
- Measure leg height
- Measure crown height
- Measure throat size
- Measure angle
- Measure gap
- Measure length
Applications:
- Welding inspection: Assessing the quality of welds.
- Quality control: Ensuring compliance with welding standards.
- Research and development: Analyzing welding processes.
How to Use a Universal Welding Gauge:
-
Measure Leg Length: For fillet welds, place the gauge’s appropriate edge or cutout against the weld and check that the leg length meets the required specifications.
-
Check Throat Thickness: Use the gauge to measure the throat thickness by aligning it between the weld’s root and face.
-
Measure Weld Reinforcement: Place the gauge on the surface to check the weld reinforcement height, ensuring it’s within acceptable limits to prevent excess or insufficient material.
-
Check Angles: For V-groove or bevel welds, use the angle measurement feature to ensure the proper angle of the weld.
-
Undercut Depth Measurement: Position the gauge along the weld toe to measure any undercuts and verify that the depth is within allowable limits.
-
Measure Gaps (Fit-Up): Before welding, use the gauge to measure the gap between parts to ensure proper alignment and fit-up for strong joints.
Key Features:
- Multiple measuring blades: Allows for measuring different parameters like bead width, depth, and undercut.
- Accuracy: Provides precise measurements for quality control.
- Durability: Built to withstand harsh industrial environments.
- Portability: Often has a compact design for easy carrying and use.
Technical Specifications


